


Photo by Bench Accounting on Unsplash
Electron + Django ( Part 2 ), package it to production
Detail guide of packaging Electron Django app by pyinstaller and electron forge


1. Introduction & POC
How do we package the electron app with django? you may be more eager to know the answer if you have completed reading "Electron + Django ( Part 1 ), desktop app integrate JavaScript & Python".
In this blog, I would like to explain the package process in detail and discuss what you may need to pay attention during the process. 😎
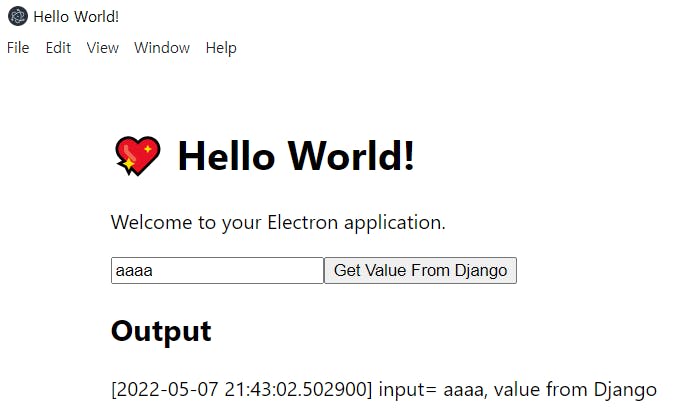
Let's show you the final result first:
In the video, we can see:
- Open the app by clicking exe file
- Testing the app to see if it works
- In the task manager, you can see there are 5 processes running

The one on the top is the python app and the remainings are the electron app
2. Prerequisites
We will base on this example to show the steps to package the app. You may follow the README to build up the project first.
3. Package Django app
We will use the pyinstaller to package Django app.
Activate the environment and install
pyinstallerpip install pyinstallerAdd
settingsfolder underedtwExamplecd python\edtwExample\edtwExample mkdir settings- Copy the
settings.pyfile into the folder and rename todev.pyandprod.py, remove the originalsettings.pycopy settings.py settings\dev.py copy settings.py settings\prod.py del settings.py
- Change the following configuration in
prod.py- Debug,
True>False - ALLOWED_HOSTS,
[]>[ '127.0.0.1', 'localhost' ] - Add
'edtwExampleAPI'inINSTALLED_APPS - DATABASES,
BASE_DIR / 'db.sqlite3'>BASE_DIR.parent / 'db.sqlite3'
- Debug,
# Django production configuration
DEBUG = False

# Only allow localhost to connect to Django apps
ALLOWED_HOSTS = [ '127.0.0.1', 'localhost' ]

# Adding edtwExampleAPI in INSTALLED_APPS to acknowledge pyinstaller to include it during the build
INSTALLED_APPS = [
    'django.contrib.admin',
    'django.contrib.auth',
    'django.contrib.contenttypes',
    'django.contrib.sessions',
    'django.contrib.messages',
    'django.contrib.staticfiles',
    'rest_framework',
    'edtwExampleAPI',
]
# Since we move the setting file into the folder,
# sqlite db file is one level higher than BASE_DIR
DATABASES = {
    'default': {
        'ENGINE': 'django.db.backends.sqlite3',
        'NAME': BASE_DIR.parent / 'db.sqlite3',
    }
}
( We will use the production configuration to package our app )
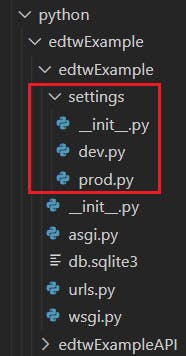
Based on the docs, create
__init__.pyinsettingsfolderPaste the following code in
__init__.pyfrom .prod import *The folder structure will look like this:
Go back to the
edtwExampleand build Django app with the following command:cd ../.. pyinstaller --name=edtwExample edtwExample\manage.py --noconfirm
If the build complete successfully, the message will be shown:

Go to
dist\edtwExampleand run the following commandcd dist\edtwExample edtwExample.exe runserver --settings=edtwExample.settings.prod --noreload(It seems that edtwExample.exe wraps up the whole python virtual environment and the manage.py)
If everything is fine, it will show the following:

Please make sure that the app is using edtwExample.settings.prod
Then we have finished our first step. 😊
3.1. Remark
There are few things I would like to point out in this step.
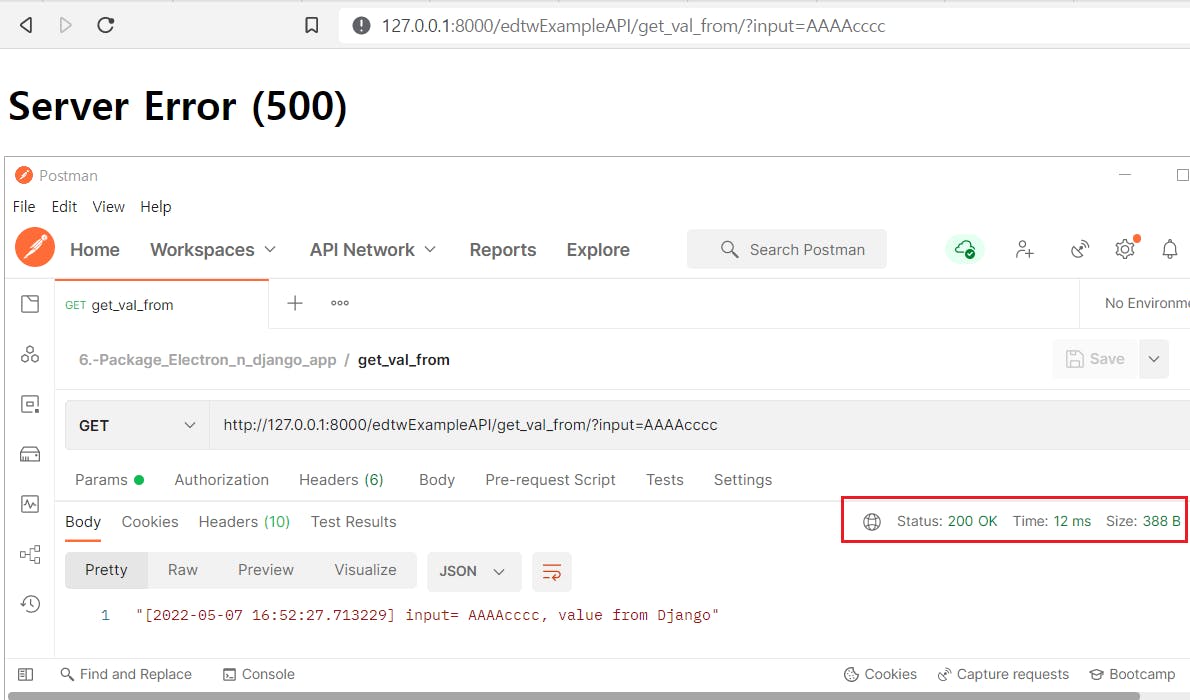
3.1.1. Server Error (500)
After you finish the first step and try to browse the API (127.0.0.1:8000/edtwExampleAPI/get_val_from/..), you may see the following:
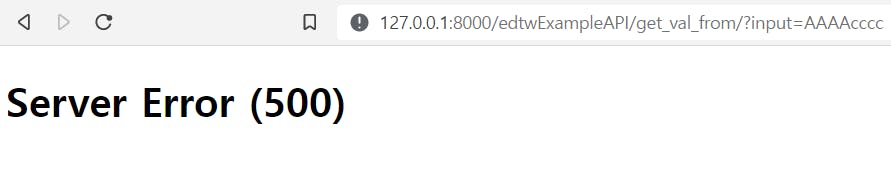
This DOES NOT mean that there is any error. After building Django app by the pyinstaller, the exe app will block browser from accessing the API.
If you would like to test the API, please use Postman or other API tools
3.1.2. TemplateDoesNotExit: DEBUG = True
If we set DEBUG = True and build the app, when we browse the url 127.0.0.1:8000/edtwExampleAPI/get_val_from/.., the following error may be shown:

The pyinstaller assumes DEBUG = False and does not include any html, css or js file into the exe app
3.1.3. ModuleNotFoundError: No module named XXX
After building the app and run the exe file, the error ModuleNotFoundError may occur
ModuleNotFoundError: No module named 'edtwExampleAPI'
One of the reason is that you may not include the required module in INSTALLED_APPS under configuration prod.py.
3.1.4. Pyinstaller rather than copy virutalenv
You may ask why don't we just copy virtual environment to the new PC instead of using pyinstaller?
I tried that but when I activated the environment, it showed that there was no package installed. 😢 Here is a rather clear explanation.
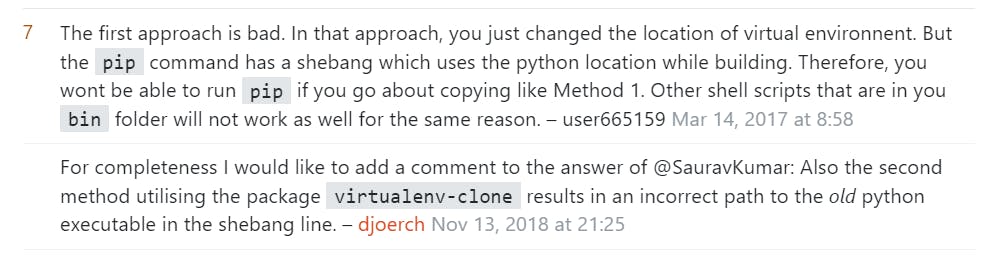
Link: Create a copy of virtualenv locally without pip install
So I decide to use pyinstaller instead.
4. Package Electron app
After generated the Django exe app, we will package the Electron app
Go back to the base folder and run the following.
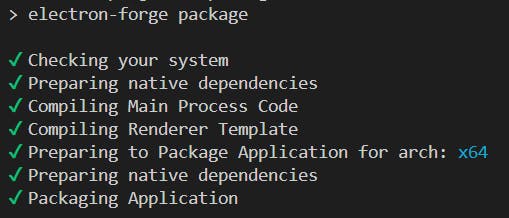
cd ..\..\..
npm run package
The success output will be shown as below.
Go to
out\edtwexample-win32-x64and runedtwexample.exe
When you test the app, you may see the following error:

This is because we did not copy the Django exe app to the package folder and We will fix this error in the next step.
5. Include Django exe in Electron package
5.1. Copy Django exe app to Electron package folder
Based on this link, in
package.json, add the followingafterExtractconfiguration"afterExtract": [ "./src/build/afterExtract.js" ]In
package.json,"license": "MIT", "config": { "forge": { "packagerConfig": { "afterExtract": [ "./src/build/afterExtract.js" ] },Create a file
./src/build/afterExtract.jsand paste the following code into the file
// eslint-disable-next-line @typescript-eslint/no-var-requires
const fs = require('fs-extra');
// eslint-disable-next-line @typescript-eslint/no-var-requires
const path = require('path');

module.exports = function( extractPath, electronVersion, platform, arch, done )
{
    console.log({ extractPath });
    fs.copy('./python/dist/edtwExample', path.join( extractPath, 'python' ), () => {

        console.log('Finished Copy Python Folder');
        done();
    } );
 }
The function is to copy our Django exe app to the Electron package folder.
5.2. Start the Django exe app during the electron startup process.
In
index.ts, first define a variableDJANGO_CHILD_PROCESSlet DJANGO_CHILD_PROCESS: ChildProcessWithoutNullStreams = null;Create 2 functions
spawnDjangoandisDevelopmentEnv
const spawnDjango = () =>
{
    if ( isDevelopmentEnv() )
    {
        return spawn(`python\\edtwExampleEnv\\Scripts\\python.exe`,
        ['python\\edtwExample\\manage.py', 'runserver', '--noreload'], {
            shell: true,
        });
    }
    return spawn(`cd python && edtwExample.exe runserver --settings=edtwExample.settings.prod --noreload`,  {
        shell: true,
    });
}

const isDevelopmentEnv = () => {
    console.log( `NODE_ENV=${ process.env.NODE_ENV }` )
    return process.env.NODE_ENV == 'development'
}
- Call
spawnDjangoin functionstartDjangoServerand change it as follow:const startDjangoServer = () => { DJANGO_CHILD_PROCESS = spawnDjango(); DJANGO_CHILD_PROCESS.stdout.on('data', data => { console.log(`stdout:\n${data}`); }); DJANGO_CHILD_PROCESS.stderr.on('data', data => { console.log(`stderr: ${data}`); }); DJANGO_CHILD_PROCESS.on('error', (error) => { console.log(`error: ${error.message}`); }); DJANGO_CHILD_PROCESS.on('close', (code) => { console.log(`child process exited with code ${code}`); }); DJANGO_CHILD_PROCESS.on('message', (message) => { console.log(`stdout:\n${message}`); }); return DJANGO_CHILD_PROCESS; }
5.3. Skip open dev tool in production
Create the following new function.
const openDevTools = ( mainWindow : BrowserWindow ) => { if ( isDevelopmentEnv() ) { mainWindow.webContents.openDevTools(); } }Call it during the
createWindowmethod.const createWindow = (): void => { ... // Open the DevTools. openDevTools( mainWindow ); };
5.4. A complete overlook
Here is the complete index.ts
import { app, BrowserWindow } from 'electron';
import { spawn, ChildProcessWithoutNullStreams } from 'child_process';
declare const MAIN_WINDOW_WEBPACK_ENTRY: string;
let DJANGO_CHILD_PROCESS: ChildProcessWithoutNullStreams = null;
if (require('electron-squirrel-startup')) {
// eslint-disable-line global-require
app.quit();
}
const createWindow = (): void =>
{
startDjangoServer();
// Create the browser window.
const mainWindow = new BrowserWindow({
height: 600,
width: 800,
});
mainWindow.webContents.session.webRequest.onBeforeSendHeaders(
(details, callback) =>
{
const { requestHeaders } = details;
UpsertKeyValue(requestHeaders, 'Access-Control-Allow-Origin', ['*']);
callback({ requestHeaders });
},
);
mainWindow.webContents.session.webRequest.onHeadersReceived((details, callback) =>
{
const { responseHeaders } = details;
UpsertKeyValue(responseHeaders, 'Access-Control-Allow-Origin', ['*']);
UpsertKeyValue(responseHeaders, 'Access-Control-Allow-Headers', ['*']);
callback({
responseHeaders,
});
});
// and load the index.html of the app.
mainWindow.loadURL(MAIN_WINDOW_WEBPACK_ENTRY);
// Open the DevTools.
openDevTools(mainWindow);
};
const UpsertKeyValue = (obj: any, keyToChange: string, value: string[]) =>
{
const keyToChangeLower = keyToChange.toLowerCase();
for (const key of Object.keys(obj)) {
if (key.toLowerCase() === keyToChangeLower) {
obj[key] = value;
return;
}
}
obj[keyToChange] = value;
}
const startDjangoServer = () =>
{
  DJANGO_CHILD_PROCESS = spawnDjango();
  DJANGO_CHILD_PROCESS.stdout.on('data', data =>
  {
      console.log(`stdout:\n${data}`);
  });
  DJANGO_CHILD_PROCESS.stderr.on('data', data =>
  {
      console.log(`stderr: ${data}`);
  });
  DJANGO_CHILD_PROCESS.on('error', (error) =>
  {
      console.log(`error: ${error.message}`);
  });
  DJANGO_CHILD_PROCESS.on('close', (code) =>
  {
      console.log(`child process exited with code ${code}`);
  });
  DJANGO_CHILD_PROCESS.on('message', (message) =>
  {
      console.log(`stdout:\n${message}`);
  });
  return DJANGO_CHILD_PROCESS;
}
const spawnDjango = () =>
{
if (isDevelopmentEnv()) {
return spawn(`python\\edtwExampleEnv\\Scripts\\python.exe`,
['python\\edtwExample\\manage.py', 'runserver', '--noreload'], {
shell: true,
});
}
return spawn(`cd python && edtwExample.exe runserver --settings=edtwExample.settings.prod --noreload`, {
shell: true,
});
}
const openDevTools = (mainWindow: BrowserWindow) =>
{
if (isDevelopmentEnv()) {
mainWindow.webContents.openDevTools();
}
}
const isDevelopmentEnv = () =>
{
console.log(`NODE_ENV=${process.env.NODE_ENV}`)
return process.env.NODE_ENV == 'development'
}
app.on('ready', createWindow);
app.on('window-all-closed', () =>
{
if (process.platform !== 'darwin') {
app.quit();
}
});
app.on('activate', () =>
{
if (BrowserWindow.getAllWindows().length === 0) {
createWindow();
}
});
5.5. Package and run
Package Electron app and run again. you should see the app running smoothly. 🎉
npm run package
cd out\edtwexample-win32-x64\
edtwexample.exe
6. Close the Django exe app when the window is closed
You may notice that Django exe process is still running even you close the app windows

We need to tell the app to kill the process once the window is close.
First, we will install
tree-killpackagenpm install tree-killThen add the following code in
index.tsapp.on('before-quit', async function () { // Kill python process when the window is closed kill( DJANGO_CHILD_PROCESS.pid ); });Add the line
kill( DJANGO_CHILD_PROCESS.pid )also inwindow-all-closedapp.on('window-all-closed', () => { if (process.platform !== 'darwin') { app.quit(); } kill( DJANGO_CHILD_PROCESS.pid ); });Package the electron app again and the problem should be fixed. 👏👏
6.1. Reason behind it
6.1.1. Django exe was spawned by shell
The Django exe process is spawned with shell: true option, which means that the process is started by the cmd rather than the exe file directly.
In index.ts
spawn(`cd python && edtwExample.exe runserver --settings=edtwExample.settings.prod --noreload`, {
        shell: true,
    });
When we close the window, we only close the shell but the process is still running.
As a result, we need to kill the process in the close windows event listener.
Explanation and solution: link.
6.1.2. Kill the process 2 event listeners
We need to kill the process in below BOTH event listeners.
window-all-closedbefore-quit
I tried to include this line kill( DJANGO_CHILD_PROCESS.pid ) in either one event only and Django process is not killed even the app window is closed.
7. Source Code
6.-Package_Electron_n_django_app
8. Reason of writing this blog
After writing the blog "Electron + Django, desktop app integrate JavaScript & Python", I think that packaging an electron app with django app is just a simple task by running one or two command, but I was wrong 😢.
When I was packaging the app, I did a lot of google searches to fix the problems emerged during the process and this was a hard time 😑 for me.
Also, during the search, I noticed that there was lack of an organized approach to explain the whole packaging process and that's why I wrote this blog.