Introduction & Concept
Sharepoint is an awesome tool to share knowledge within a team. Often, we would like to enhance its functionality to fulfill our needs.
And this time, we would like to add a signature field ✍ in SharePoint.
You may say it sounds great, but how do we do it? 🤔
Application Demo
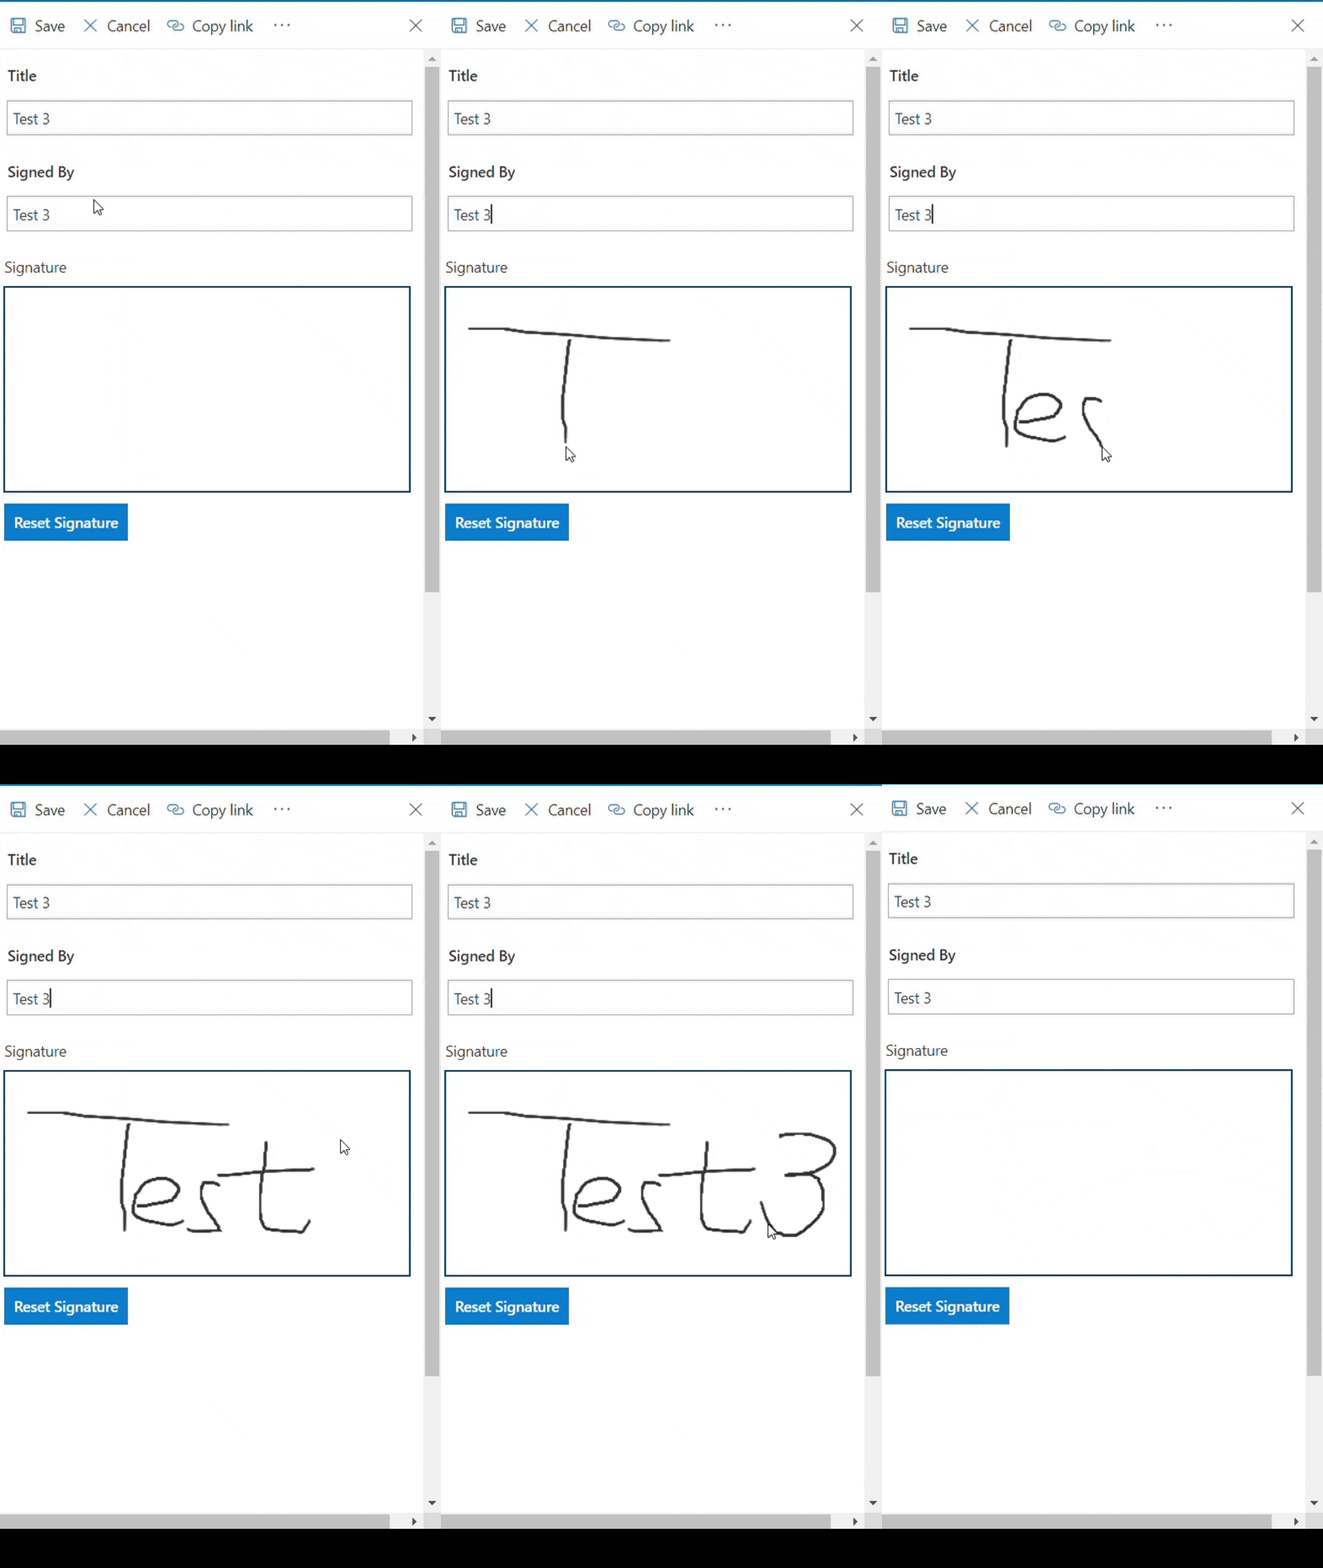
Well, first look at the result application:
- When a user first creates a record, user can see a signature box and sign in it. The user can also click "Reset Signature" to clear the original one and sign again
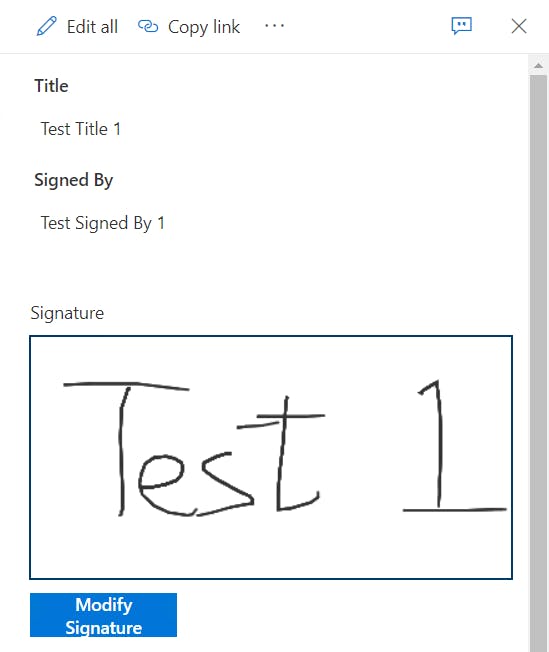
- When user view the record again, user can see the signature
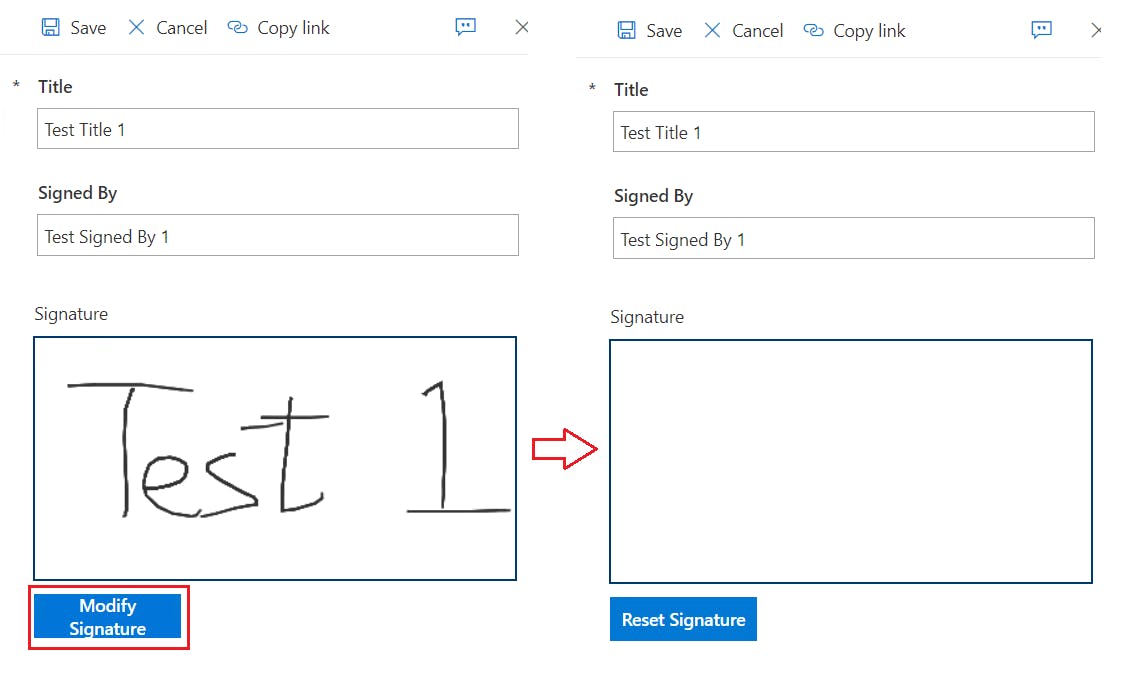
- When user edit the record, user can click "Modify Signature" to sign again
Steps
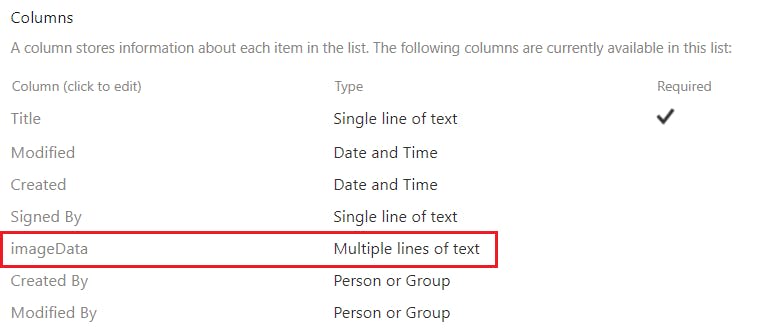
1. Add a multiple lines of text column
So, create a multiple lines of text column and named it "imageData" in the SharePoint list. This is for saving signature image byte.
(There is also image type column in SharePoint, but this type of column CANNOT BE UPDATED IN POWER APPS.)
2. Add PenInput & Reset Button
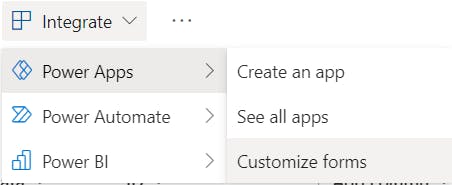
Then, direct to Power Apps by using Customize forms function in SharePoint
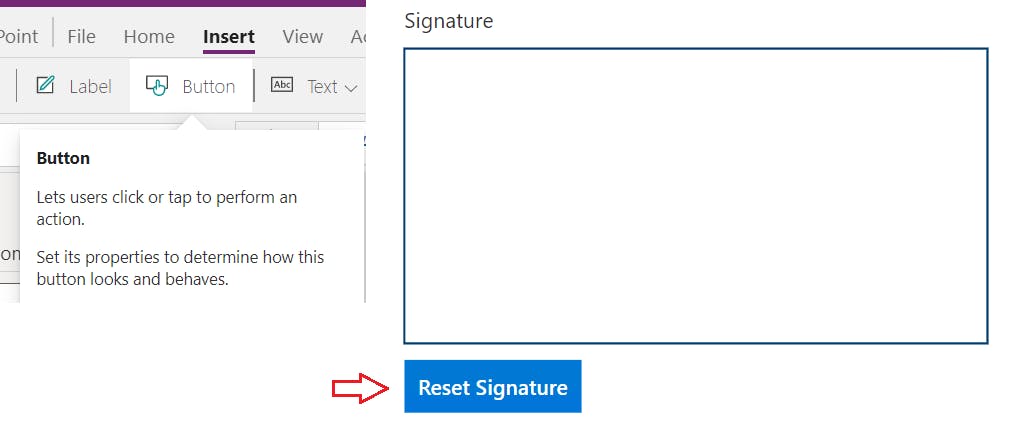
Add a PenInput into the app and place it a suitable position.
You can hide the control by set false to ShowControls.


Add a button and named it as "Reset Signature".
Add the command Reset( PenInput1 ); on the property OnSelect

3. Save the signature when click Save
Add the following script to SharePoint Integrations's OnSave so when user click "Save", it will insert the image byte to the column.
SubmitForm(SharePointForm1);
Set( currentSharePointItem,LookUp( '<Your List Name>', ID=SharePointForm1.LastSubmit.ID ) );
Patch( '<Your List Name>', currentSharePointItem, { imageData :  Substitute( JSON( PenInput1.Image, IncludeBinaryData ), """", "" )  } );

For Substitute( JSON( PenInput1.Image, IncludeBinaryData ), """", "" ), the output of JSON( PenInput1.Image, IncludeBinaryData ) is like "data... EWQS==", which the image byte is surrounded by double quotes ". In order to remove it, we used Substitute.
You can retrieve the SharePoint record id by SharePointForm1.LastSubmit.ID.
Ref:
Patch function in Power Apps (contains video) - Power Apps | Microsoft Docs
Replace and Substitute functions in Power Apps - Power Apps | Microsoft Docs
Check Point
You can save and publish the app. When you create a record, and if you follow the steps correctly, you should be able to see saved image byte in the imageData field.

4. Create image to show Signature
Go back to Power Apps. Insert an image and place it on top of the PenInput.
(PenInput.Image cannot be modified. So we need to add an image for showing signature.)

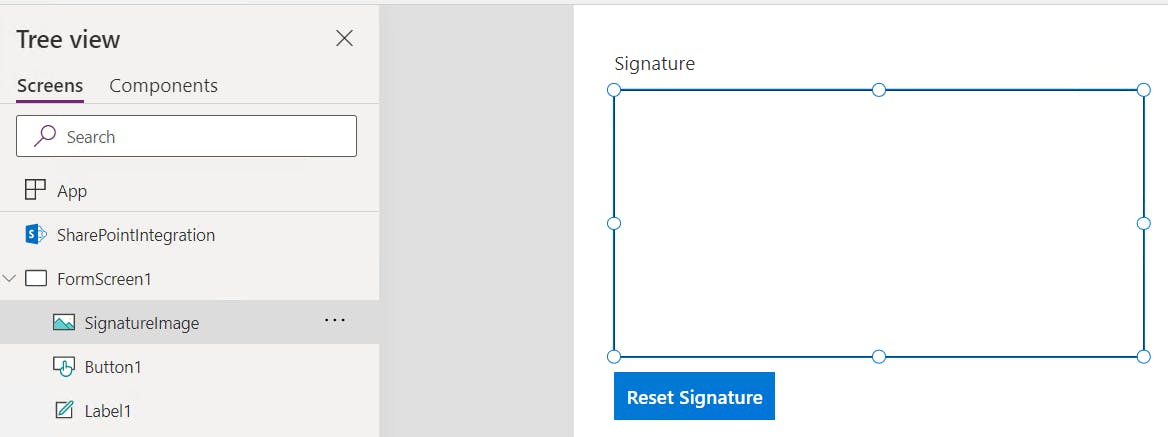
Input LookUp( '<Your List Name>', ID=SharePointIntegration.SelectedListItemID ).imageData in the property Image

Check Point
You can replace SharePointIntegration.SelectedListItemID into the record's id in LookUp( '<Your List Name>', ID=SharePointIntegration.SelectedListItemID ).imageData. If everything is fine, you can see the signature image you just signed
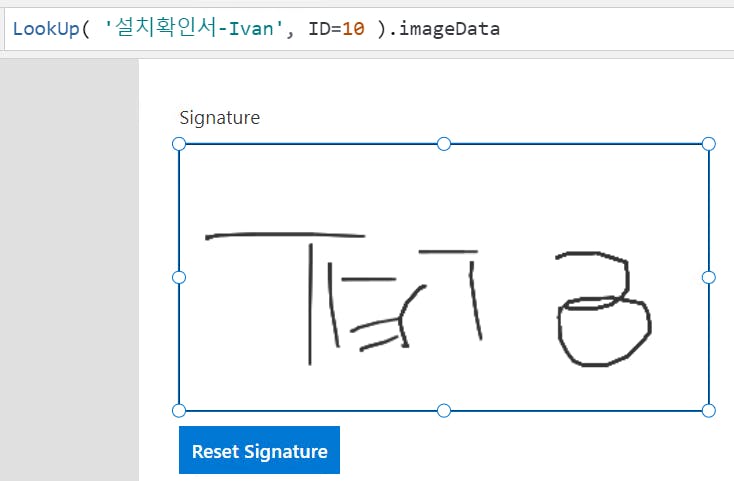
You can also view the record in SharePoint to check if the signature is correctly shown.
5. Add logic to hide and show the signature Image
You may already found that as the image has been on top of the Signature, you cannot modify the signature.
In order to resolve this problem, we will show and hide the signature image accordingly:
- New Record, hide the signature image
- View Record/Edit Record, show the signature image
- Edit the signature, hide the signature image
In order to accomplish the above, create a global variable isSignatureImageVisible and set it to true/false accordingly:
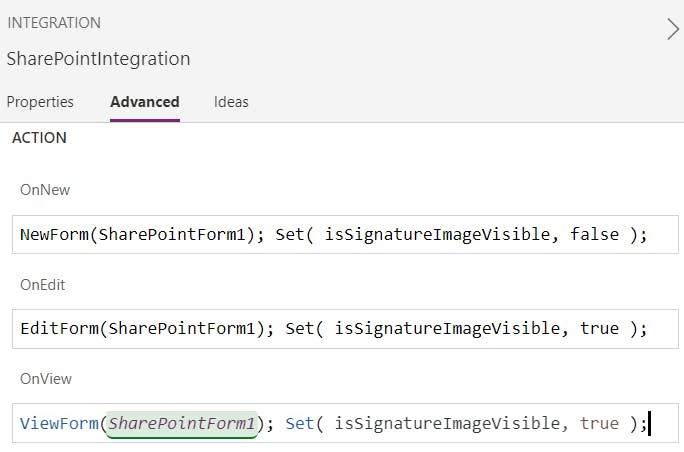
For "Edit the signature, hide the signature image" part, when user edit the record, we will do as follow:
- Change the button text from "Reset Signature" to "Modify Signature"
- After user clicked "Modify Signature", it will clear the current signature and change the text back to "Reset Signature"
Set the "Reset Signature" button's property as shown below:

If( isSignatureImageVisible ,"Modify Signature", "Reset Signature")

Set( isSignatureImageVisible, false ); Reset( PenInput1 );
Finally, we would like to save the signature only if user has changed the signature.

SubmitForm(SharePointForm1);
If( ! isSignatureImageVisible,
    Set( currentSharePointItem,LookUp( '<Your List Name>', ID=SharePointForm1.LastSubmit.ID ) );
    Patch(  '<Your List Name>', currentSharePointItem, { imageData :  Substitute( JSON( PenInput1.Image, IncludeBinaryData ), """", "" )  } ) );
Done!🎉👏
Conclusion
When I first receive this request, I have done some google search on the Internet and found that there are mainly 2 ways to accomplish this. Both of the methods need to use Power Apps since there is no signature field in SharePoint. The differences are:
- Save the signature image byte in the multiple lines of text created in Sharepoint.
(The one we introduced) - Save the signature image file in the one drive and then get the link and pass to hyperlink field or attach it to the record in SharePoint.
I have chosen the 1st method because:
- First method is more straight-forward. It only needs to consider Power Apps and SharePoint, but second method involves NOT JUST the above two apps, but also OneDrive and Power Automate.
- Signature image has a more direct relation with the SharePoint record in the first method, but for the second method, the signature image is related to the SharePoint record through a hyperlink.
- Since first method is simpler, you can pay less effort when you maintain the application

