
💡Tip 1, Wait Step Best practice, Configuration implementation
Introduce implementation of wait step and configuration


1. Introduction
Here are helpful tips for developing robots in Kofax RPA. Let's start.
2. Use ✔ Active Wait, Not 💩 Passive Wait
- Active wait: wait until a change occurs, e.g. wait until a window appeared
- Passive wait: wait within a designated time period, e.g. wait 10s
We will use a example to explain why active wait is a better choice. For example, after user press a button, a pop up windows will appear after a while.
- If we apply active wait, the wait will end after the pop up windows appear
- If we use passive wait, e.g. 10s, every time the robot will need to wait 10s. We know that the actual amount of time which cost the pop up windows to appear is different each time, so:
- If actual wait time < 10s, time will be wasted.
- If actual wait time > 10s, timeout error may occur.
2.1. Wait until element appears
This is provided by default in the Kofax RPA and it is already mentioned in the above example.
2.2. Wait until element disappears
This is particularly useful for waiting until the end of the loading screen.
In Kofax RPA, there are two options for element disappears:
- Application Not Found, used case: loading windows disppear
- Location Not Found, used case: a button disappear
For details
E.g. Wait until loading windows disappears
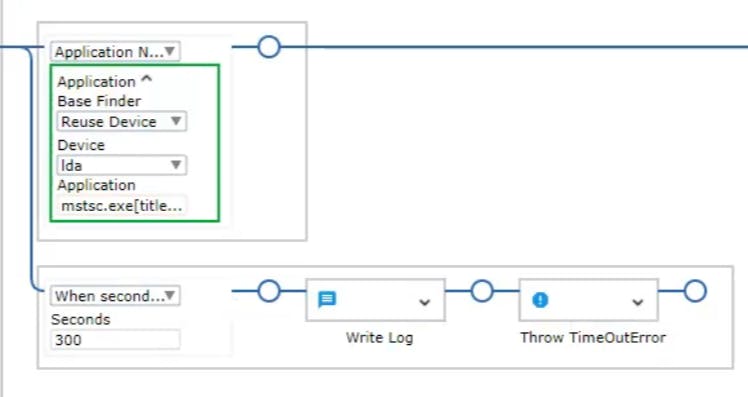
The above one is a DA(Desktop Automation) step. Things to include in this step:
- Timeout (in seconds)
- Write Log (error log for the application / location does not disappear for a long time, for troubleshooting)
- Throw TimeOutError
💡Tips: Add a 2s wait step before application not found/location not found. This is to wait for the element to appear. Otherwise, if the previous step finishes and the element still not show up yet, the robot will just pass the not found step and error may occurs.
2.3. Wait Until element content change
Sometimes, when the loading finished, only the text content of an element changes. In this case, we may need to apply a little alogithm.
index = 0
new element content = element content
while new element content == element content:
    new element content = get element content

    wait for a designated amount of time (1-2s)

    if index > loop limit:
        log custom error
        throw custom error

    (index = index + 1, carry in the background by iteration variable)
E.g.: When user click a button, before the action complete, records will be shown as 0.

After the loading finished, the records will be larger than 0. (in example, it is 119.)

Here are the robot steps:

2.4. Make the change by ourselves
One of the worst case is that you can only know whether the loading is finished or not by the loading sign ⌛ of cursor. Unfortunately, RPA does not recognized it 😱.
In this case, we need to make chage by ourselves.
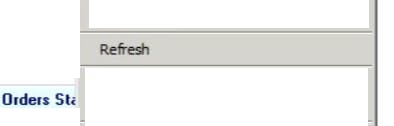
One of the good way is to right click a place and wait for the menu item to come out by using wait until element appears.
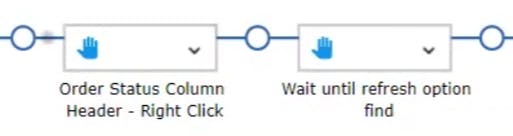
E.g. RPA right clicks the "Order Status" and wait for the "Refresh" menu item to appear after loading completed.
DA Steps:
2.5. Usage of Passive wait
Sometimes, you may need to add a passive wait to slow down your RPA process to prevent error occurs.
You may add a passive wait (1-2s) after the following steps:
- Click a button
- After an active wait
- After press key or text input
- Focus an application
- e.t.c
Normally a passive wait should less than 5s.
3. Use ✔ Configuration, Not 💩 Hard Code
For initial development or POC(Proof of concept), hard code is acceptable.
However, do not hard code in the production code as:
- May lead to bug or error
- Difficult to maintain (as we need to look for the hard code in the robot flow)
- Change the hard code may accidentally change the logic also
- Need to change it repeatedly
One of the ways to set up configuration is using excel and json file.
- Excel file, configuration for user to change it
- Json file, configuration for the robot developer use only
💡Tips: If user is familiar with json format, use json instead of excel as Kofax RPA natively support json.
3.1. Excel Configuration (Implementation)
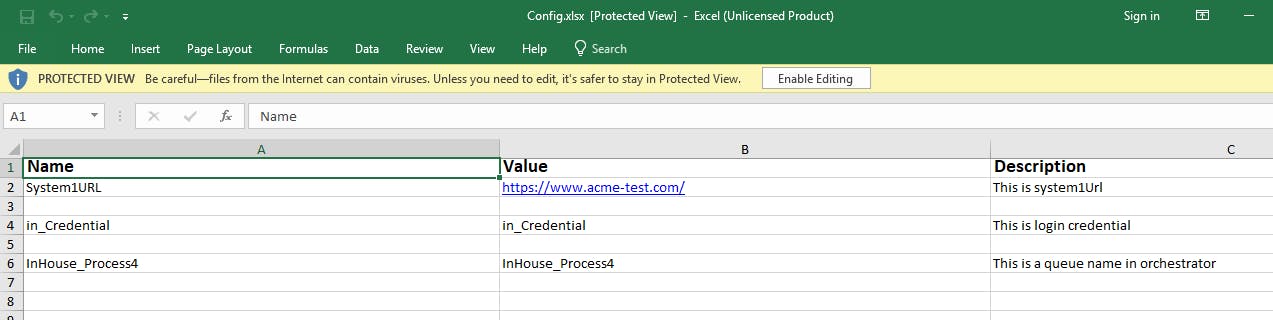
The excel format is simple and it only has 3 columns:
- Name, configuration name
- Value, configuration value
- Description
We will use the following 3 steps to read the excel.

- Load Config Excel file to a excel variable
- Open the variable in DS(Design Studio)
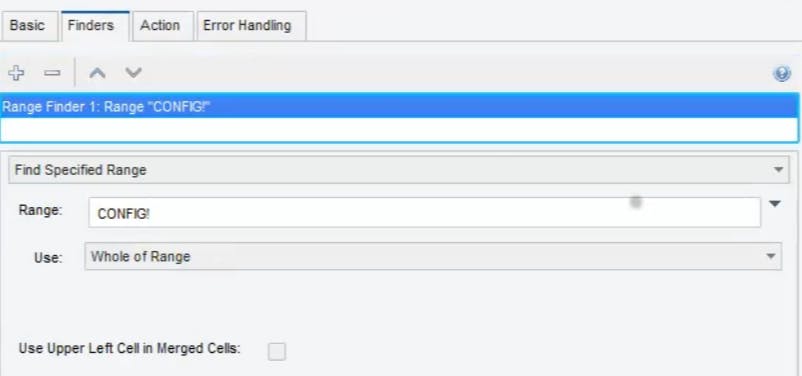
Extract the text in excel and convert it to json by JavaScript😱(Yes, we use programming here)
Specify the range as the whole sheet
Use JavaScript to convert the extracted text to JSON object and then store it in json variable
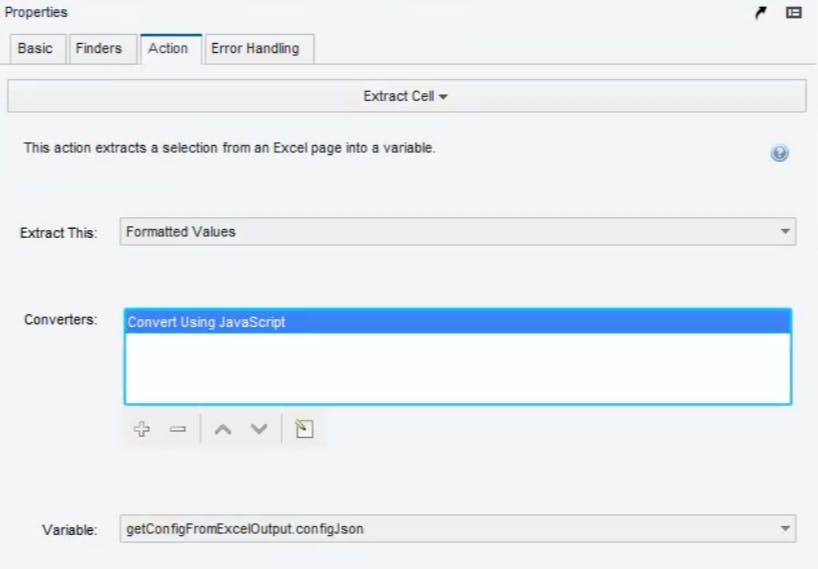
Code:
OUTPUT = convert2Json( INPUT );

function convert2Json( input )
{
    var configObj = {};
    var rowList = input.split(/\r?\n/);
    for( var i = 0; i < rowList.length; i++ )
    {
        if( ! rowList[ i ].split( "\u0009" )[ 0 ] )
        {
            continue;
        }
        var val = rowList[ i ].split( "\u0009" )[ 1 ];
        configObj[ rowList[ i ].split( "\u0009" )[ 0 ] ] = typeof( val ) === "string" ? val.replace(/^\s+|\s+$/g, '') : val;
    }
    return JSON.stringify(configObj);
}
💡Tips: Kofax RPA only support ES3 JavaScript in "Convert Using JavaScript". You cannot use the magic trick in modern JavaScript.
💡Tips: Configuration path is better to save in a DA file and DS get the configuration path from DA than save it as default value in a variable. It is because when you change the configuration path, you only need to change the DA file but not the DS file.
e.g. In DA file, we set the configuration path in Return step in ConfigPathDAIn DS, we call the get the configuration path by calling ConfigPathDA
This is especially useful when you have several sets of configuration.
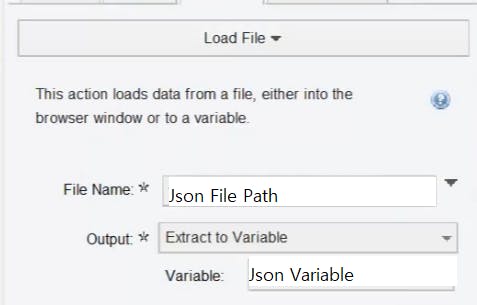
3.2 Json Configuration (Implementation)
You just Load the content of a json file to a json variable using Load File step.