💡Tip 3, Creating custom action by JavaScript and Python
Detail guide and explanation of using custom action by JavaScript and Python

1. Custom Action Introduction
If RPA needs to perform the following tasks, e.g.
- Complicate data manipulation procedures
- Certain features which are not easily created by action step
- Custom code for some steps
what can we do?🤔
We can create our own steps, named "Custom Action" by programming. Kofax RPA natively support 2 programming languages for creating custom action:
- JavaScript (used Node.js)
- Python
2. Create custom action in JavaScript
Using JavaScript to develop custom action has the following advantages:
No need to install Node.js in DA (Desktop Automation) or MC(Management Console)
Node.js is natively included in Kofax RPA:
- Development Installation:
C:\Program Files\Kofax RPA 11.2.0.8.493 x64\nativelib\hub\windows-x64\2261\bin\node.exe - Desktop Automation PC:
C:\ProgramData\Kofax RPA\11.2.0.8_493\bin\node.exe
- Development Installation:
You can pack the external library into the connector package (we will explain later) and you do not need to install it independently in DA or MC
No extra setup for the custom action
2.1. Prerequisite
Install the same version Node.js as Kofax RPA in development PC
In order to get the version:
- Open
cmdandcdto the path mentioned above - Type
node --versionand press enter and you can see the version
- Open

For Kofax RPA 11.2.0.8, node.js version = 12.22.1 (Quite old actually 🤦♂️, already end of life). Recommend to use nvm for development.
- Download the Node.js code in the repository and follow the
READMEto setup Node.js custom action
2.2. Create connector package
Create a
distfolder inNodeJsfolder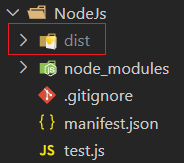
Zip the following file and folder and place the zip file in
distnode_modulesmanifest.json
Rename the zip file to
<name>.connector(e.g. in our case,sampleHandler.connector)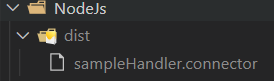
💡Tips: You can write a script to automate the process of creating connector package. For simplicity, we do this manually here
2.3. Call custom action in DS (Design studio)
Download the Kofax RPA Project here
Open the project in DS
Place the .connector file in the Kofax RPA Project Folder folder
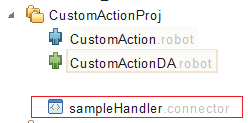
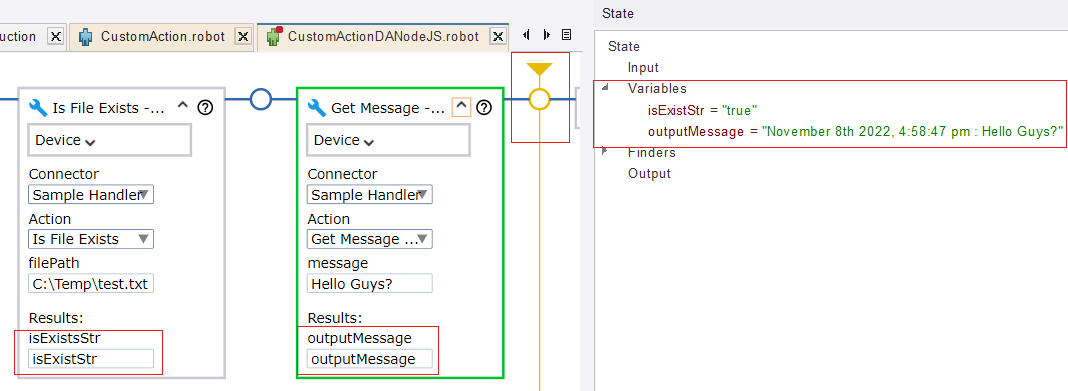
Run the project in Design mode and get into the DA
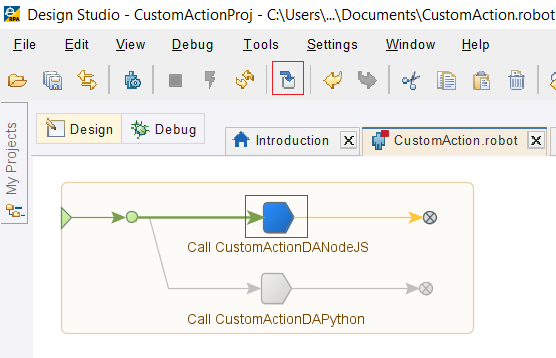
You may also disable the branch of calling
CustomActionDAPythonRun to the highlighted point and you can see the result
2.4. Run it in schedule or MC
Uploaded the project and set up schedule and run in MC, that's it 🎉
Note: You may need to remove the branch of calling
CustomActionDAPythonin order to run smoothly
2.5. Remark
2.5.1. Principle of Node.js custom action
According to Kofax,
Node.js JavaScript requests are wrapped in a function() context and executed. If the code contains require statements, they are resolved using the node_modules directory in the root of the Connector package...
We will use the
isFileExistsmethod to explain the meaning:First, look at the
commandlineinmanifest.jsonofisFileExists"commandline": [ "const { isFileExists } = require( \"sampleHandler/sampleHandler\" ); return { isExistsStr : isFileExists( %1 ) };" ]RPA transform the above
commandlineinto below and call it:function() { const { isFileExists } = require( "sampleHandler/sampleHandler" ); return { isExistsStr : isFileExists( "C:\Temp\test.txt" ) }; }As a result, in Kofax RPA, you can get the output
isExistsStr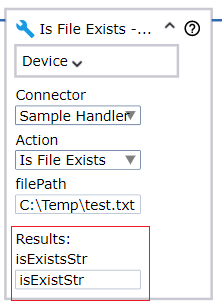
2.5.2. Limitaton of Parameter & Respose
For the type of the parameter and respose, only string and interger is allowed. Ref
Type of the parameter. The type must be one of the following: “string” or “number.” “number” parameters are restricted to integral numbers.
Type of the response. The type must be one of the following: “string” or “number.” “number” response are converted to integral numbers.
💡Tip: since only string or integer is allowed, if your output has a complicate data structure, use json to return
2.5.3. Using External Library
We need to create a folder (in example,
sampleHandler) insidesnode_modulesand develop our custom code insides it.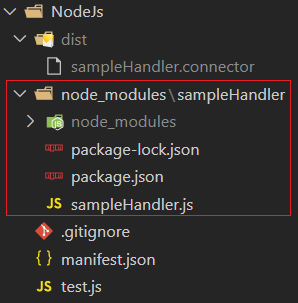
Run the following code to install npm package:
  cd node_modules\sampleHandler
  npm install <package name>
In
manifest.json, remember to importsampleHandler.jsas follow:"const { isFileExists } = require( \"sampleHandler/sampleHandler\" );"The method
getMsgWithCurrentDateTimeis an example of using external library momentThe concept here is to treat
sampleHandleras an independent project and you can install package in itI have tried to run
npm installinNodeJsfolder but after that, all the content insidesnode_moduleshas been removed.
3. Create custom action in Python
Compared with Node.js, using Python can also create custom action, but you need to:
- Install Python in root environment of all the DA or MC, which runs custom action
- Install the required python packages in root environment of all the DA or MC, which runs custom action
Create custom action in Python is more complicated than Node.js. Unless you must use some libraries (e.g. pandas) in Python, I recommend using Node.js
3.1. Prerequisite
- Install Python in development PC, (in example, we used 3.9.10)
- Download the Python code in the repository and follow the
READMEto setup Python custom action
3.2. Create connector package
Create a
distfolder inPythonfolder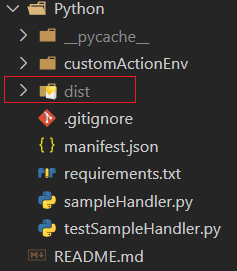
Zip the following files and place the zip file in
distsampleHandler.pymanifest.json
Rename the zip file to
<name>.connector(e.g. in our case,sampleHandlerPy.connectorD)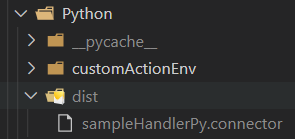
💡Tips: You can write a script to automate the process of creating connector package. For simplicity, we do this manually here
3.3. Call custom action in DS (Design studio)
Download the Kofax RPA Project here
Open the project in DS
Place the .connector file in the Kofax RPA Project Folder folder

Run the project in Design mode and get into the DA

You may also disable the branch of calling
CustomActionDANodeJSRun to the highlighted point and you can see the result

3.4. Run it in schedule or MC
3.4.1. Install required Python package
In this example, since we set the device to local, the package is installed in MC.
If you would like to run it in DA, Python and the required packages should be installed in DA.
Export the required Python package
mkdir dist\pip_install
pip download -r requirements.txt -d dist/pip_install
Install Python in the DA and put the Python and pip in Path of system variable
Move the folder
pip_installandrequirements.txtinto the required DAPlaced the
requirements.txtinsides the folderpip_installand run the following insidespip_install:pip install --no-index --find-links ./ -r requirements.txt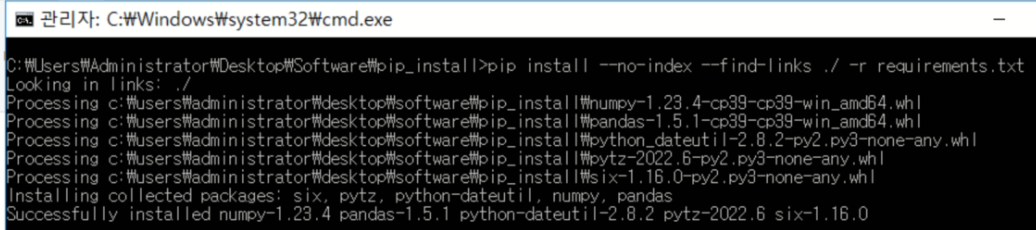
Ref: Install Python Package Offline
3.4.2. Set up schedule
Uploaded the project and set up schedule and run in MC, that's it 🎉
Note: You may need to remove the branch of calling
CustomActionDANodeJSin order to run properly
3.5. Remark
3.5.1. Principle of Python custom action
According to Kofax,
Python requests are run using the exec() statement with a persistent private global() dictionary. The root of the connector package is added to the front of the sys.path to allow the connector to provide its own modules...
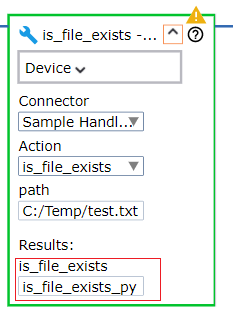
We will use is_file_exists method to explain the meaning:
- First, look at the commandline in
manifest.jsonofis_file_exists"commandline": ["from sampleHandler import SampleHandler; rpa_return = SampleHandler.is_file_exists( %1 ) "]
RPA transform the above command line by replacing the parameter and execute it by exec(), which convert string to python code. Ref
exec("from sampleHandler import SampleHandler; rpa_return = SampleHandler.is_file_exists( \"C:\\Temp\\test.txt\" )")
After that, RPA gets the output by the variable rpa_return and the mapping in response and assign it to is_file_exists_py
"response": [
    {
        "name": "is_file_exists",
        "type": "string"
    }
3.5.2. Limitaton of Parameter & Respose
Same as Node.js, for the type of the parameter and respose, only string and interger is allowed. Ref
Type of the parameter. The type must be one of the following: “string” or “number.” “number” parameters are restricted to integral numbers.
Type of the response. The type must be one of the following: “string” or “number.” “number” response are converted to integral numbers.
💡Tip: since only string or integer is allowed, if your output has a complicate data structure, use json to return
3.5.3. Using External Library
In the development environment, installed the package by
pip installExport and install the package in production environment as specified in section Install required Python package


